How to set up default values for Shopware 6 plugin config
This article will show you, how to set up default values, that you want the user to see in your plugin’s configuration, after he installs and activates it. If you are new to the Shopware 6 plugin configuration, then I suggest you read my article How to create config for your Shopware 6 plugin first, to get some basic information with examples. This article expands the knowledge from the previous one and also builds on some information from the article Accessing your plugin’s classes during its installation and activation.
Set the default values in config.xml
The easiest way to set up the default value of a configuration variable is to put it to an appropriate XML element in the config.xml file:
|
1 2 3 4 5 6 7 8 9 10 11 12 13 14 |
<?xml version="1.0" encoding="UTF-8"?> <config xmlns:xsi="http://www.w3.org/2001/XMLSchema-instance" xsi:noNamespaceSchemaLocation="https://raw.githubusercontent.com/shopware/platform/master/src/Core/System/SystemConfig/Schema/config.xsd"> <card> <title>Iron Maiden plugin</title> <input-field type="int"> <name>theNumberOfTheBeast</name> <label>The number of the Beast</label> <defaultValue>666</defaultValue> </input-field> </card> </config> |
However, there are certain limits to this, at least in Shopware version 6.4, which is the most recent version at the time of the writing of this text.
Internally, Shopware 6 uses a JSON field, named ‘configuration_value’ in the ‘system_config’ table for storing the plugin config values. That is a fine choice, because it gives a lot of flexibility and allows to save nearly anything in there. However, if we take a look at how the default value from the config.xml file gets saved, it is limited by the method ‘phpize’ from the XmlUtils library, used by Shopware for this purpose.
This is how the method ‘saveConfig’ from the class ‘vendor/shopware/core/System/SystemConfig/SystemConfigService.php’ looks like:
|
1 2 3 4 5 6 7 8 9 10 11 12 13 14 15 16 |
public function saveConfig(array $config, string $prefix, bool $override): void { foreach ($config as $card) { foreach ($card['elements'] as $element) { $key = $prefix . $element['name']; if (!isset($element['defaultValue'])) { continue; } $value = XmlUtils::phpize($element['defaultValue']); if ($override || $this->get($key) === null) { $this->set($key, $value); } } } } |
If you want to use a component in the plugin configuration page, whose value is an array, the config.xml way method is not usable. Luckily, there is a viable alternative.
Set the default values in the plugin’s main class
When do you want to set the defaults? The answer would usually be: during installation or activation of the plugin. And rightfully so. The user can access the plugin configuration from the Shopware backend only after the plugin is properly installed and activated. So if we could not set something up in the config.xml file, we have another chance to do it, when he installs or activates our plugin.
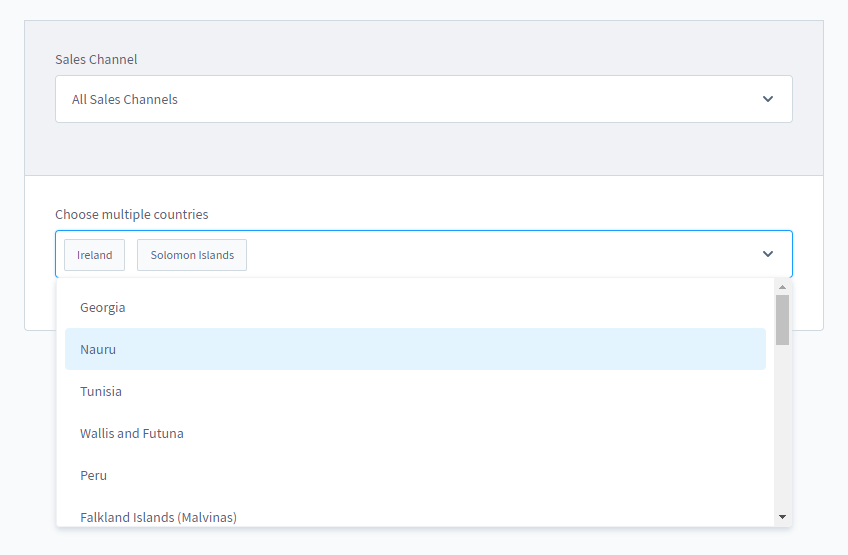
So let’s take an example of the ‘entity multi select’ component, that contains the countries. Here is how it looks visually in the plugin configuration:
And this is the source code behind it:
|
1 2 3 4 5 6 7 8 9 10 11 12 |
<?xml version="1.0" encoding="UTF-8"?> <config xmlns:xsi="http://www.w3.org/2001/XMLSchema-instance" xsi:noNamespaceSchemaLocation="https://raw.githubusercontent.com/shopware/platform/master/src/Core/System/SystemConfig/Schema/config.xsd"> <card> <title>SomePlugin Settings</title> <component name="sw-entity-multi-id-select"> <name>testCountry</name> <entity>country</entity> <label>Choose multiple countries</label> </component> </card> </config> |
This component allows us to select multiple countries from the country repository. Similarly, we could create such a component for products and other entities, if we specified them in the <entity> element.
Now we want to pre-select some countries. If we try to use <defaultValue> in the config.xml file, we are going to be disappointed. It will not work, because of the fore mentioned limitations. To the rescue come the ‘install’ and ‘activate’ methods of our main plugin class!
As I have explained in the Shopware 6 plugin programming tutorial, every plugin for Shopware 6 must contain the main class, that is named similarly. This class extends the core class Plugin, which in turn extends the class Bundle etc. For us it means, that we can access the dependency injection container. Therefore we have access to the public classes, including the one, that we need for setting the config values. Yes, it is the ‘SystemConfigService’ class!
Here is the code for getting the SystemConfigService during installation and activation of the plugin:
|
1 2 3 4 5 6 7 8 9 10 11 12 13 14 15 16 17 18 19 20 21 22 23 24 |
<?php declare(strict_types=1); namespace SomePlugin; use Shopware\Core\Framework\Plugin\Context\InstallContext; use Shopware\Core\Framework\Plugin\Context\ActivateContext; class SomePlugin extends \Shopware\Core\Framework\Plugin { public function install(InstallContext $installContext): void { parent::install($installContext); $config = $this->container->get('Shopware\Core\System\SystemConfig\SystemConfigService'); } public function activate(ActivateContext $activateContext): void { parent::activate($activateContext); $config = $this->container->get('Shopware\Core\System\SystemConfig\SystemConfigService'); } } |
Now we can use the method ‘set’ to set the default values for our country multiselect, but before that, we have to know, which values we want to put there. Putting in the names of the countries or their ISO codes will not work. As usual in Shopware 6, every record in an entity table has a unique ID, called UUID. This is not your classical numerical autoincremented ID, so it is bit trickier to get it from the database. We can do it like this:
|
1 |
SELECT LOWER(HEX(id)) as ID, country.* FROM country |
Please notice the ‘LOWER’ keyword in the MySQL query. It converts the characters in the UUID string to lower case. In same places in Shopware 6, this conversion is not necessary. However, in this case, it definitely is – otherwise the UUIDs would not get matched.
So now we have the IDs of the countries, that we want to pre-select in our multiselect component. At last, we can set them as default values during the plugin installation:
|
1 2 3 4 5 6 7 8 9 10 11 12 13 14 15 16 17 18 19 20 21 22 23 24 |
<?php declare(strict_types=1); namespace SomePlugin; use Shopware\Core\Framework\Plugin\Context\InstallContext; use Shopware\Core\Framework\Plugin\Context\ActivateContext; class SomePlugin extends \Shopware\Core\Framework\Plugin { public function install(InstallContext $installContext): void { parent::install($installContext); //get the config service $config = $this->container->get('Shopware\Core\System\SystemConfig\SystemConfigService'); //specify the values $value = ['00c5df10202e4752bda16d6810e3046a', '0186c25f8c5a433b821dc34e95c28dbf']; //set the specified values as defaults $config->set('SomePlugin.config.testCountry', $value); } } |
If you install your plugin now and activate it, you will see the pre-selected countries in the plugin configuration page. Hooray! 🙂
If you want to delve more into the topic of Shopware 6 plugin installation, uninstallation, activation and deactivation, I really recommend reading my article Accessing your plugin’s classes during its installation and activation. In any case, thank you for reading and if you have any suggestions or additional questions, please leave them in the comments below.